Configuration steps WooCommerce
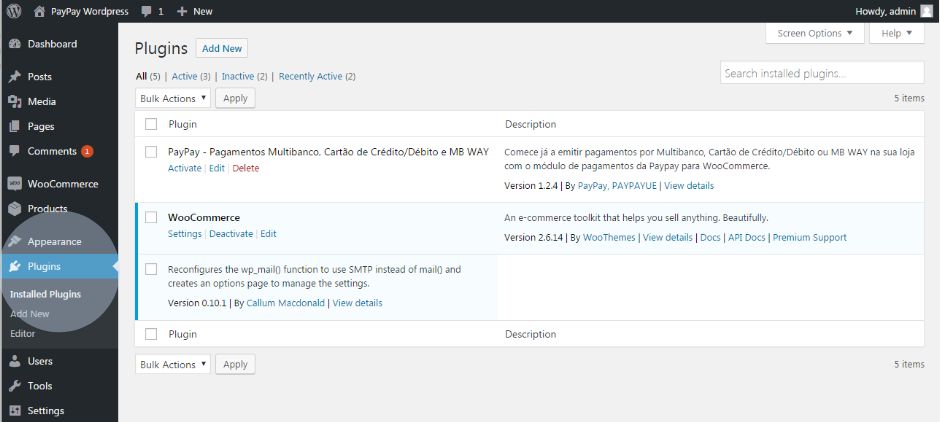
In the administration/backoffice environment of your e-commerce shop, go to the ‘Plugins’ menu and select the option ‘Installed Plugins’.
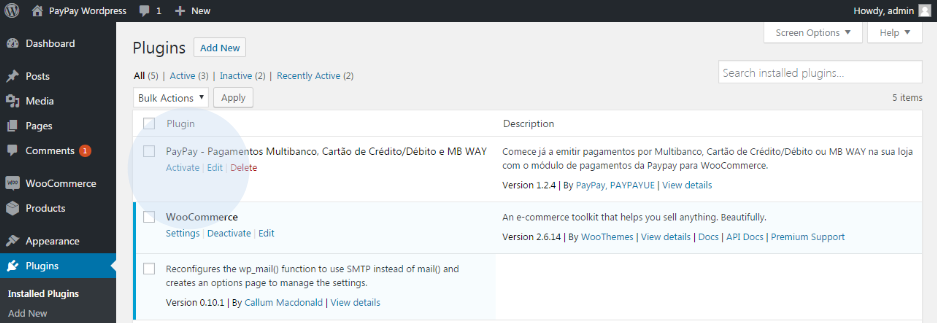
In this area you can see the PayPay payment module (ATM -Multibanco-, Credit/Debit Card and MB WAY). Activate the PayPay plugin.
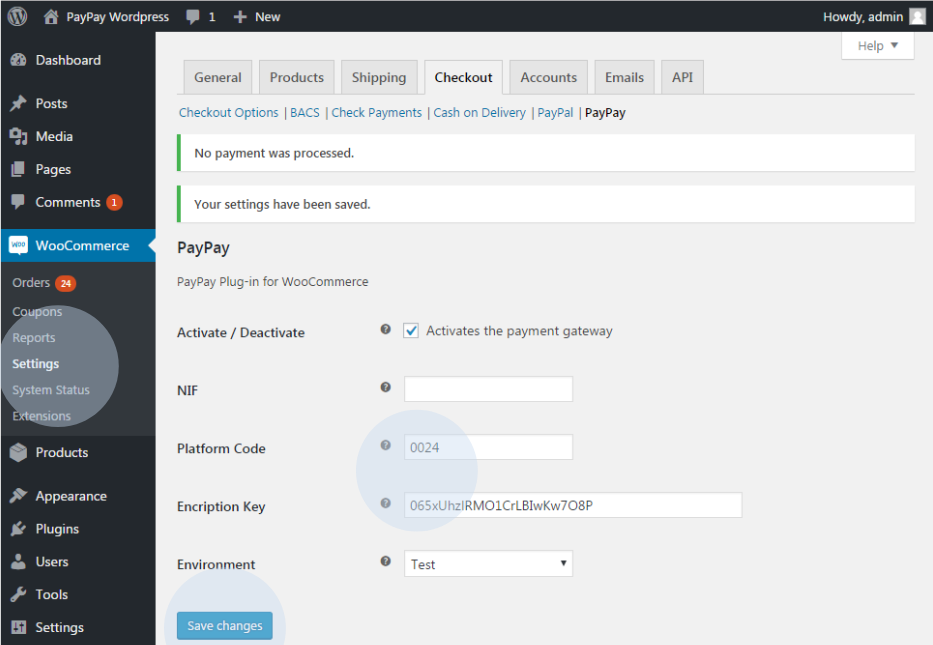
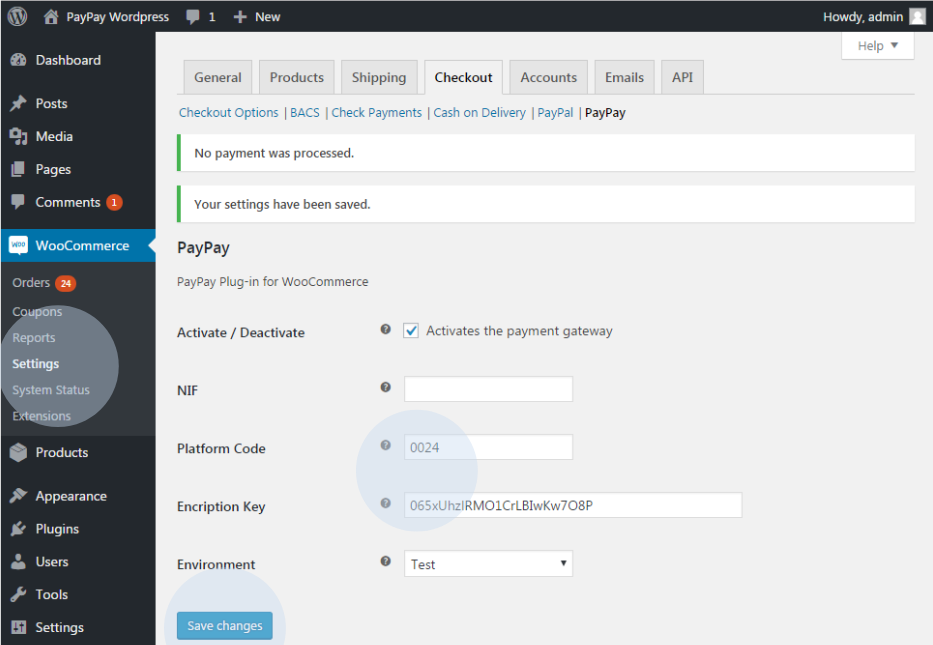
Click on the ‘Settings’ option and fill in the fields with the PayPay details, which you can get from ‘Configuration’ > ‘Integrations’ > ‘Integration Platforms’ > ‘Add’ (WooCommerce Extension), and at the end, select the option ‘Save Changes’.
You can use the test environment to test the integration before starting it in the production environment. To do this, use the following access data:
NIF | |
Código de Plataforma: | 0009 |
Chave de encriptação: | 4F16A63E4ABA1 |
Go to https://paypay.acin.pt/paypaybeta/ and check the status of your payments:
Utilizador: | woocommerce@paypaybeta.pt |
Password: | DPdZesMkpx |
After configuration, you will be able to check if you have any outstanding payments.
The following image shows the home page of your WooCommerce shop. If you do not have any items available, you will need to create them in your administration area.
Now your shop can generate and provide payment data to your customers in real time, according to the chosen payment method (ATM -Multibanco-, Credit/Debit Card and MB WAY).
If you have any questions, please do not hesitate to contact us. We are available to help you with the configuration.